10-Minute Gym Quick Start Guide
Welcome to Techfeifan Gym & Studio Software! This quick start guide will help you digitize and automate your entire fitness club or studio in under 10 minutes. Follow the verified steps below, inspect the live screenshots, and review the end-of-guide video tutorial.
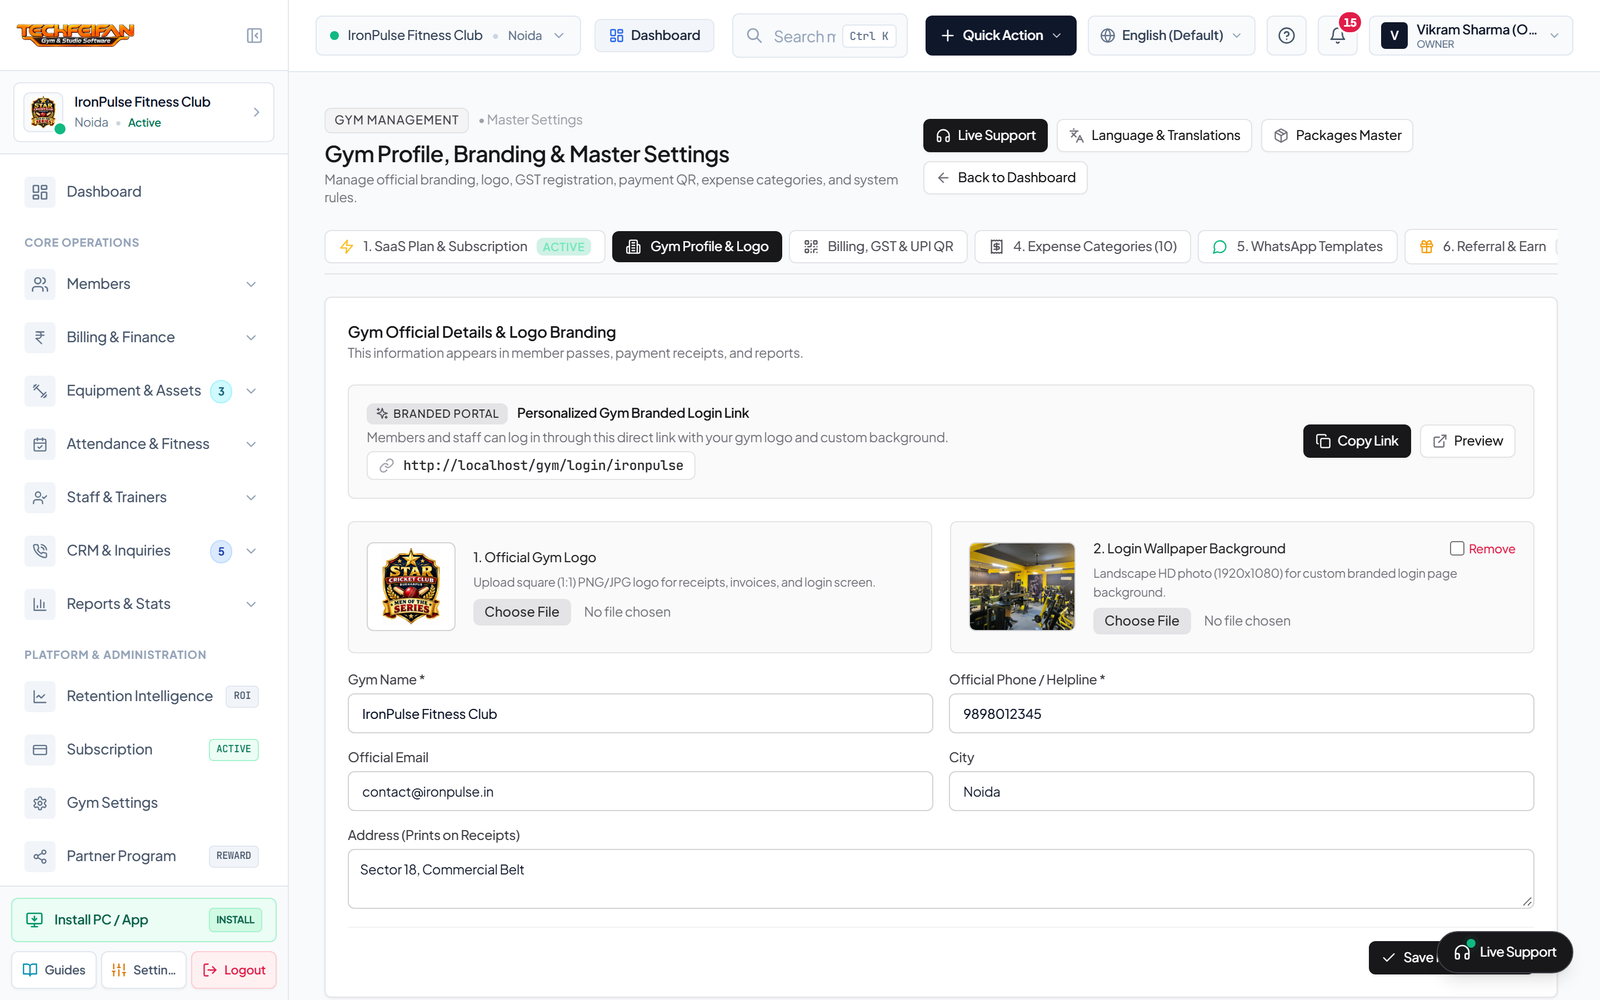
Step 1: Gym Profile & Branding Setup
Configure your official gym identity and payment channels first:
- In the left sidebar navigation, click on Settings & Branding.
- On the Gym Profile Tab, enter your Gym Name, Official Phone Number, Support Email, City, and Full Address.
- Official Gym Logo: Upload your logo (PNG/JPG) to ensure it appears on digital receipts, member ID cards, and the Member Mobile App.
- UPI ID & QR Code: Upload your Google Pay / PhonePe / Paytm UPI QR code so members can settle fees directly from automated WhatsApp payment reminders.
Step 2: Membership Packages Create Karein
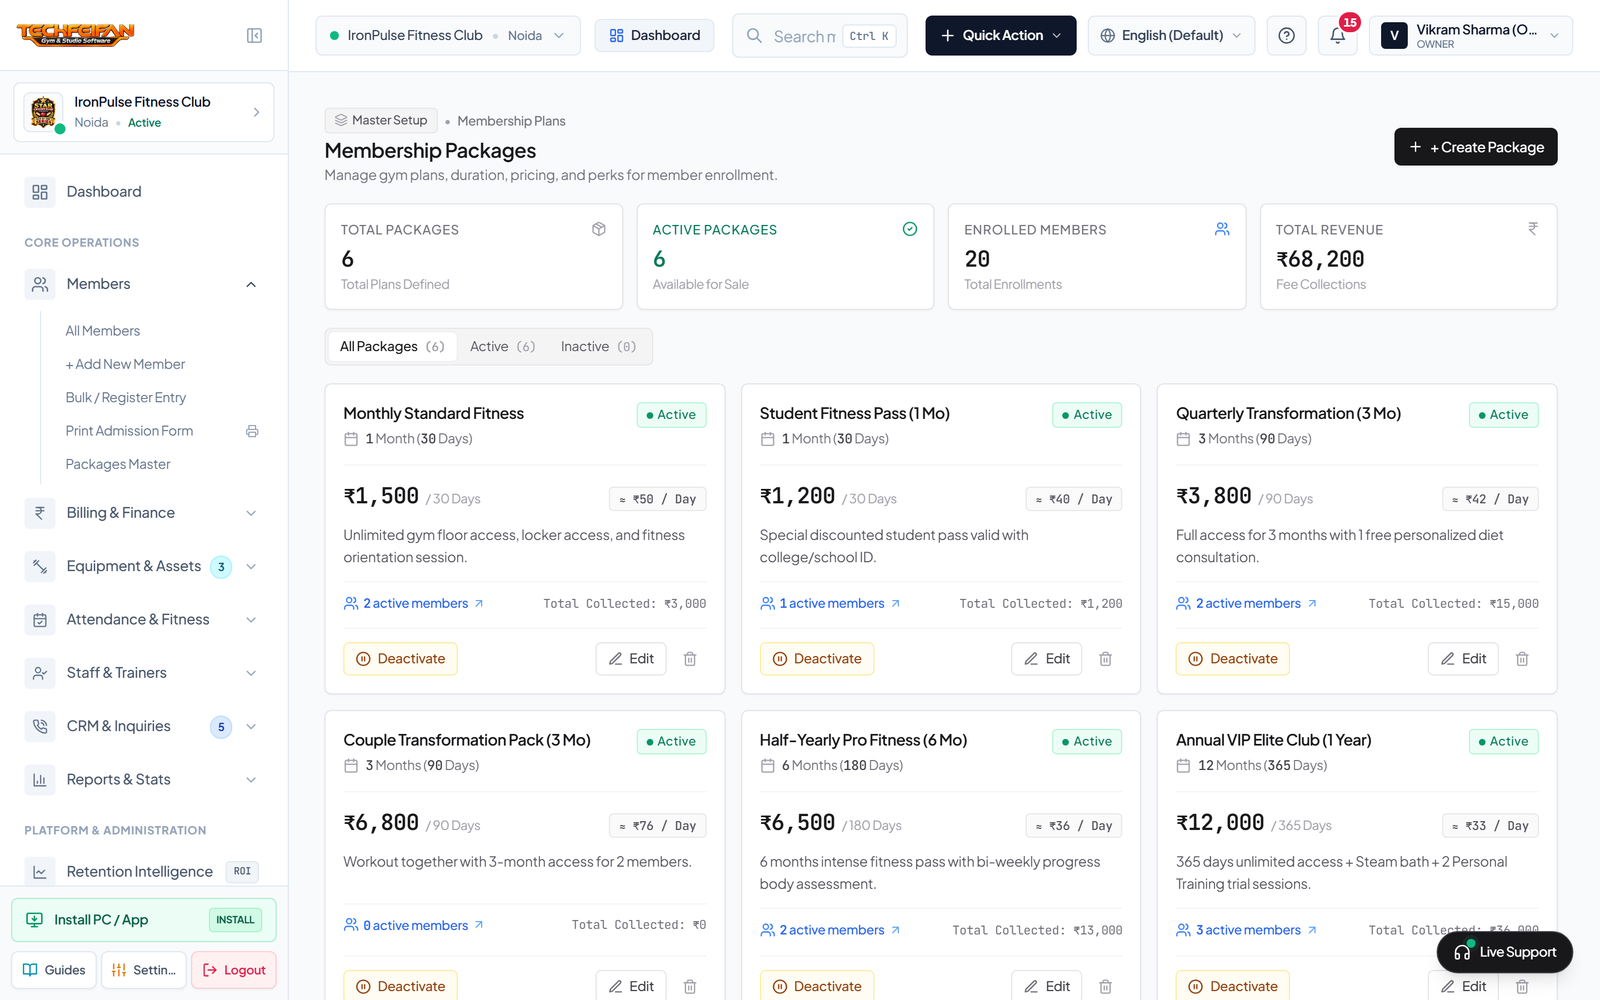
Before admitting members, establish your membership tiers under Members -> Packages Master:
| Plan Name | Duration | Sample Price | Included Benefits |
|---|---|---|---|
| Monthly Standard | 30 Days | ₹1,500 | General Strength & Cardio Floor Access |
| Quarterly Transformation | 90 Days | ₹3,800 | Gym Floor + Custom Workout & Nutrition Plan |
| Annual VIP Club | 365 Days | ₹12,000 | All Access + Group Classes + Membership Freeze Option |
Step 3: Pehla Member Onboard Karein
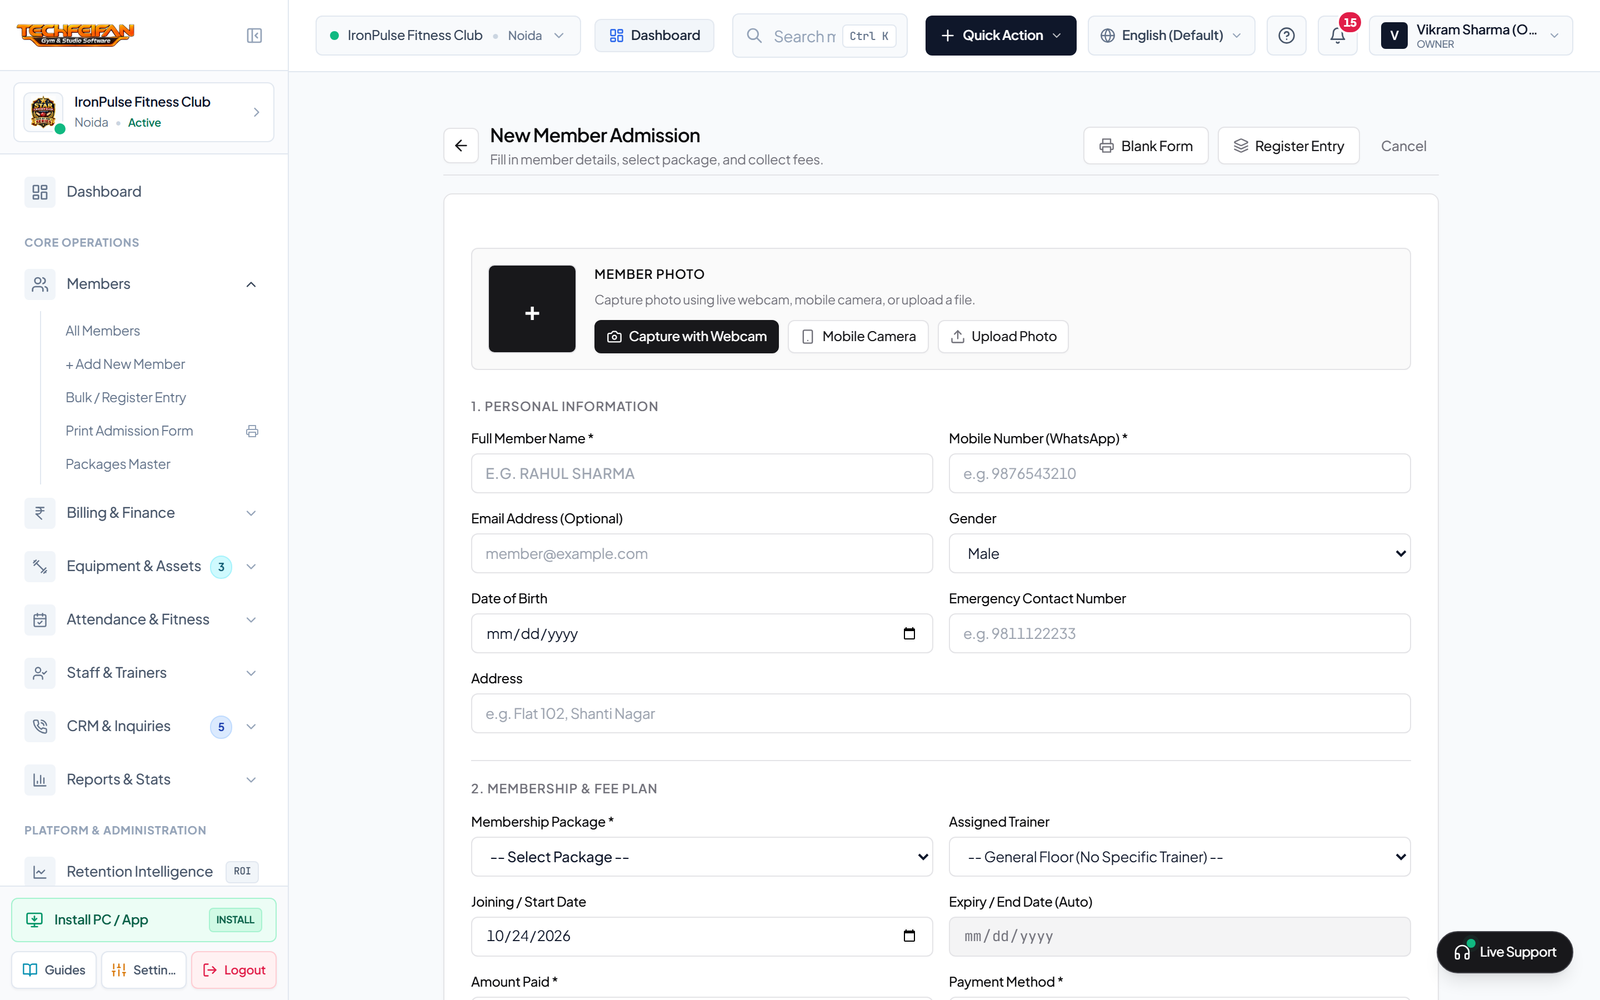
In the left sidebar, navigate to Members -> + Add New Member:
- Enter the member's Full Name, 10-Digit WhatsApp Mobile Number, and Email Address.
- Select the desired Package — Start Date and Expiry Date calculate automatically.
- Enter the Paid Amount and choose the Payment Mode (UPI, Cash, or Card).
- Capture the member's profile photo with the Live Webcam KYC tool and click Save Member.
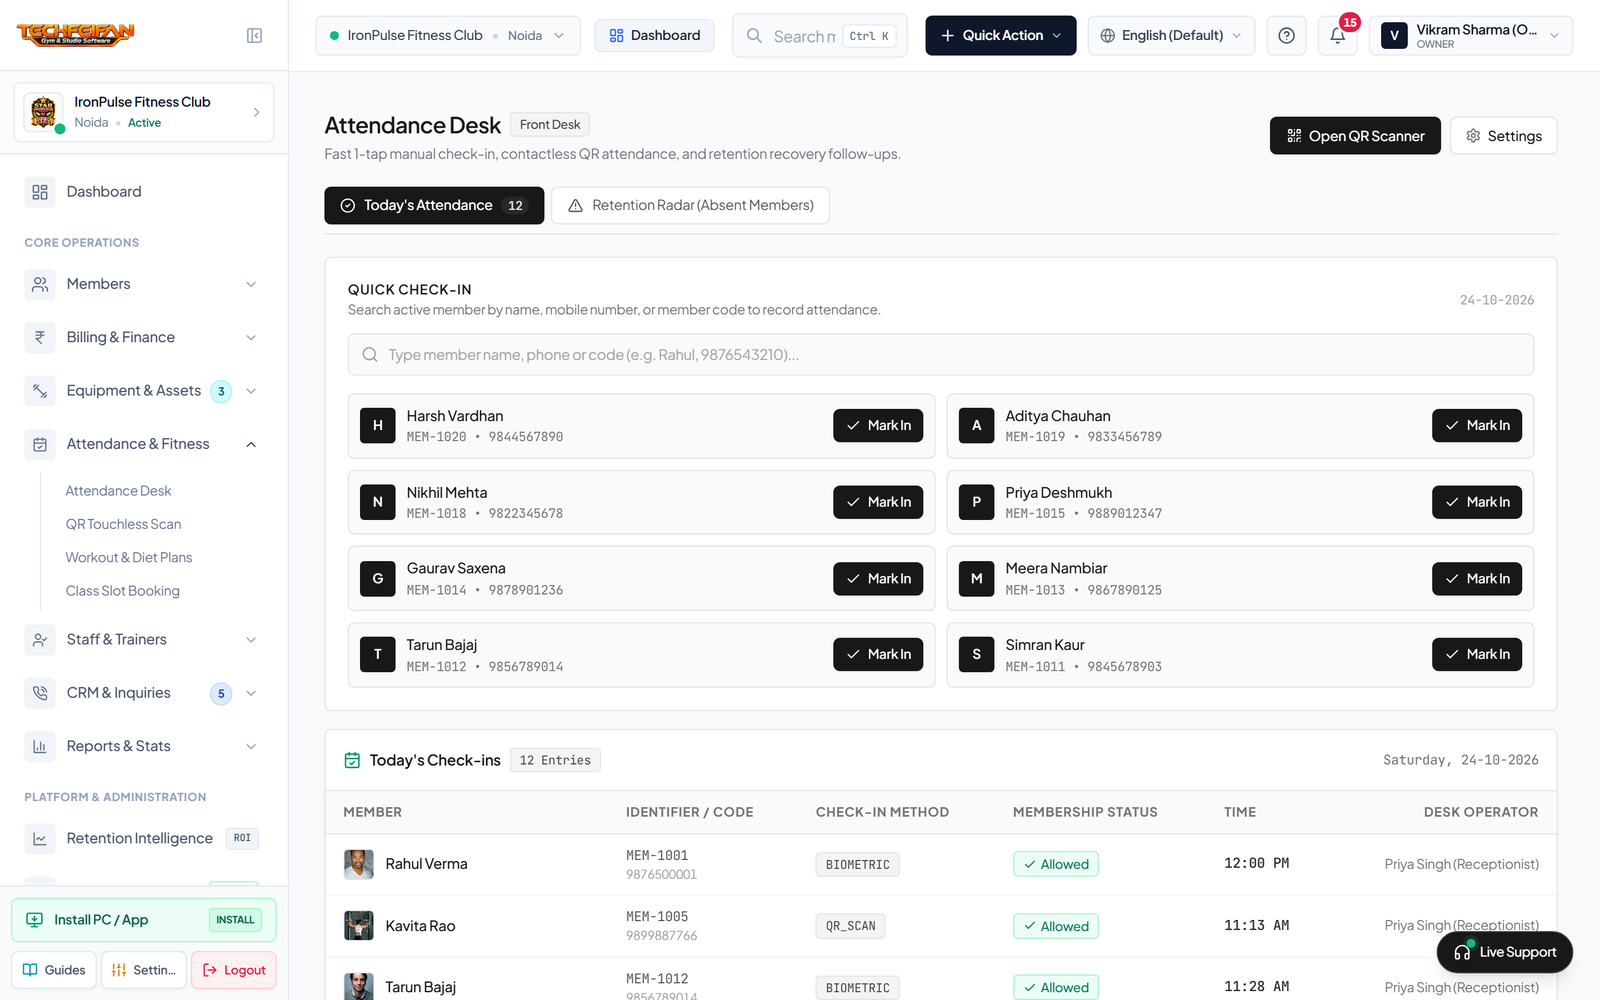
Step 4: QR Attendance & Mobile Portal Test Karein
Instruct your member to open gym.techfeifan.online/portal/login on their phone browser and sign in using their 10-digit mobile number. Their digital QR pass will open instantly. Test the check-in by scanning the QR code using Attendance & Fitness -> QR Touchless Scan on your reception tablet or webcam!